


On our next Pixel Art Tutorial series, we’ll be working on a simple scenery. A simple scene using pixel art principles. Check out the pixel art tree tutorial here, and perhaps you could add it into this tutorial.
Right, let’s get cracking!
Step 1: Find a Suitable Palette
I would recommend going to Lospec and discovering new palettes submitted by very talented artists from all around the world. If you’re not excellent with colors, this is a place to start and look at the color palettes used by the artists that submitted their artwork along with.
After looking at all the awesome available color palettes, I wanted something simple. So, I’ve gone with this palette:


You can also check it out on the Lospec site directly here.
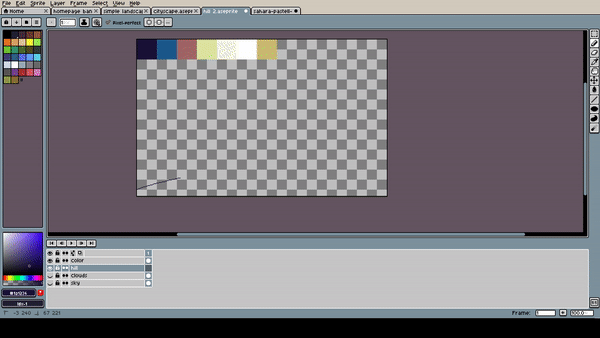
Step 2: Setting Up Aseprite
Alright, we got our colors. Open a new Aseprite tab. Set the canvas at 450 (W) x 250 (H).
The next thing we need to do is make a couple of layers beforehand. Make 4 new layers. Press Shift+N 4 times to make it quickly. Name them as below:
- Color
- Sky
- Hill
- Cloud
Select the layer you’ve named Color. This layer will exclusively be for the palette you’ve gotten earlier. Copy and paste it. You can turn the layer on or off when you need to sample the colors.
The canvas is now set. Time to start the process.
Step 3: Set up the Sky

Select the Sky layer. Use the Paint Bucket tool (G) and select the color on the most right of the palette. Once you’ve done that, you can turn off the sky layer. Or leave it on. I turn it off, so I can see details of the other layers when I’m working on them.
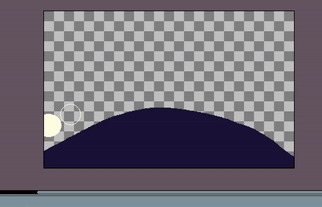
Step 4: Draw a Hill

Use the dark purple from the palette. Select the Color Picker tool (I). Click on the purple and select your Brush (B). What you want to do is draw the top part of a circle.
Once you’re done, select the Paint Bucket tool (G) and fill in the color.
Add a couple of grass blades on top of the hill, to give more details to what the purple mound is.
Step 5: Add in Clouds

There are many ways to make clouds in pixel art. This is my way. Well, at least clouds for this particular piece.
Take the beige color and use it as the base for the clouds. Use the Filled Eclipse tool (Shift+U twice). Make circles around the hill. Use different sizes and try to imagine the outline of a cloud.

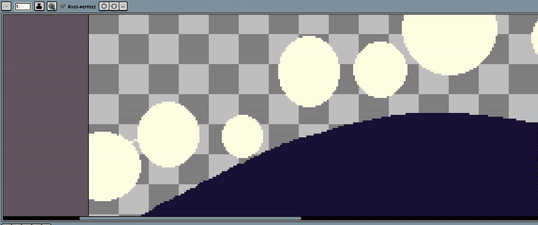
Once you’ve made the circles, select the Brush tool (B), and draw lines. Draw lines connecting the circles to each other. Make sure the lines follow the contour of the circles so you have smoother looking clouds.
Once you’ve done the lines till the end of the canvas, it’s time to fill in the clouds. Use the Paint Bucket tool (G) and fill up the rest of the cloud.

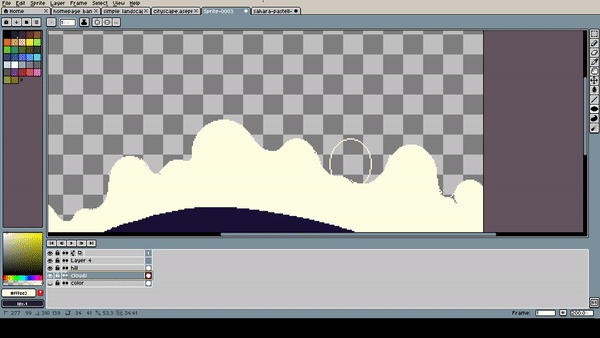
You can add small circles to add more “fluff” to give it more of a cloud look. You also need to clean up any sharp edges and stray empty pixels. The goal here is to give smooth bumps for the clouds. Add and subtract as much as you want till you get a cloud that you want.


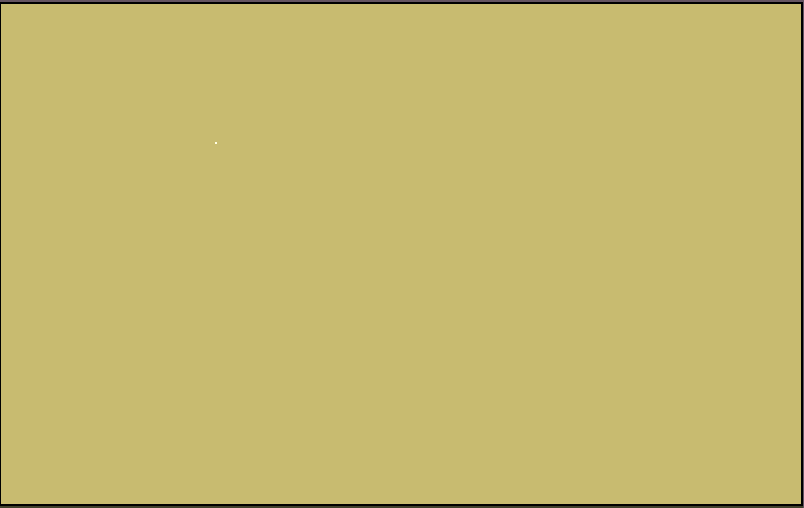
This is the final product. I’ve made some adjustments to the hill size so that the clouds can be showcased. Compare the hill in this image to the one in the beginning. Making pixel art is all about finding what works best for the piece and making adjustments accordingly.
I’ll be adding more tutorials along the way, and we’ll start adding items from different tutorials into one singular piece.
But till then, have fun creating!